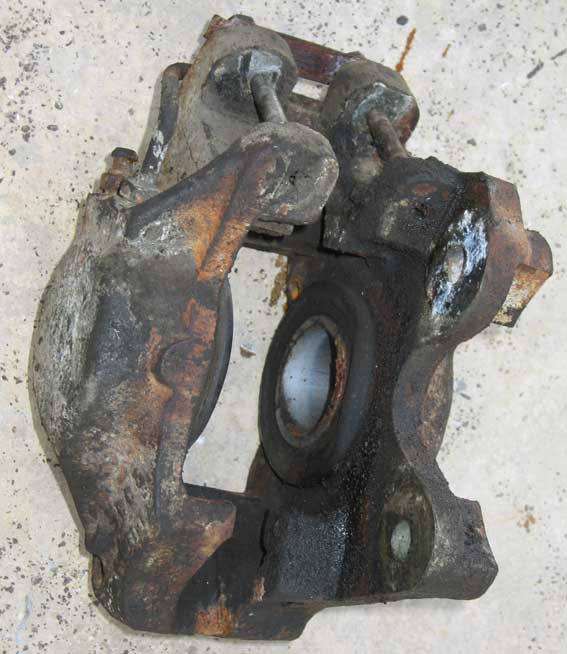
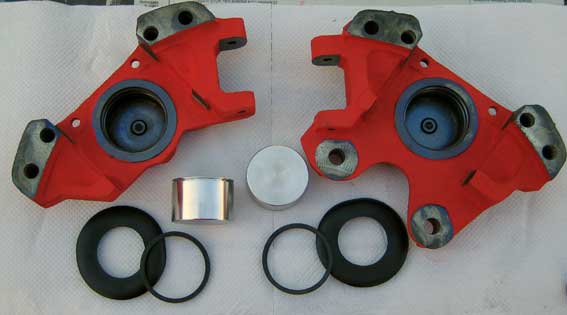
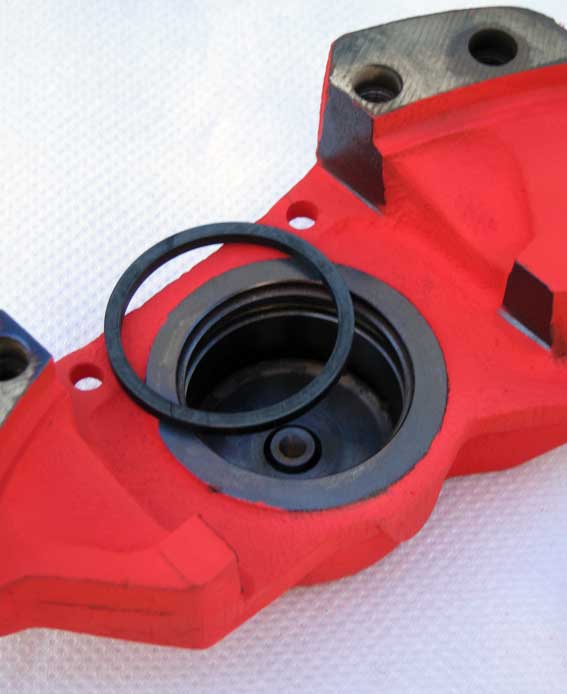
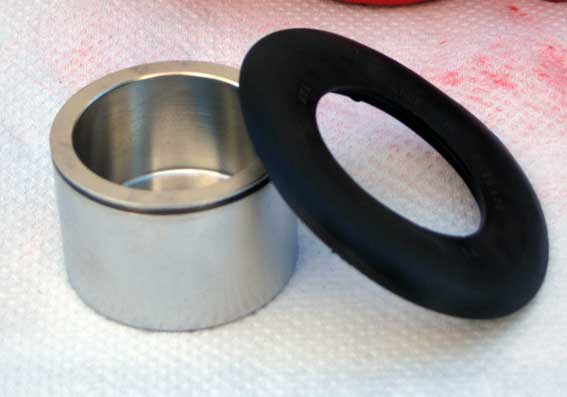
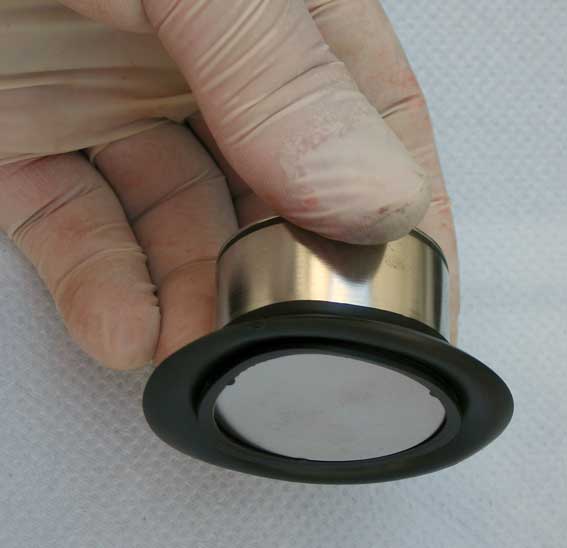
S3 E-Type

Rr Brake Rebuild

by Administrator

Rebuilding these rear calipers is straightforward, the only complication is the need to be 110% confident that everything is right, as these brakes are so difficult to get to - you certainly don't wanna have to go back there again...

Here's a pic of my caliper on removal, some hint of oil leaking from the differential output seals and causing some contamination ( a common failure mode):

rear_brakes_12.jpg


Apart from the general result of 35years use, it actually looks OK.


rear_brakes_13.jpg


No need to take much care on disassembly as all new rubbers are needed.  Here you can see corrosion around the piston.

rear_brakes_14.jpg

Sorry it's a little blurry....this piston is damaged.. the chrome plating is corroded where the seal will sit... using these parts again invites early failure (with new, thick, pads you'll be using this part of the piston).

rear_brakes_15.jpg


One benefit on these rear calipers is that the fluid channel between the 2 sides is 'external', via that short brake pipe. That means you can split the caliper without worries: there's no fluid seals in there.

Given the state of these brake pistons I decided to get some new Stainless Steel ones made. That was quite straightforward at a local engineering shop, they are '304' Stainless, here's the drawing:

e-type_rear_brake_piston_1.jpg

I cleaned the caliper halves using a wire brush in an angle grinder & decided (non-original) painting would be the best protection...  on eBay the only high-temp paint I could get was boy-racer-red ... but it's like wearing kinky underwear....who's gonna know...??

So, heres the parts - new seals & new pistons:

rear_brakes_01.jpg


Fit the pressure seal into the groove in the caliper, lubricate the bore with brake fluid:

rear_brakes_02.jpg


Slide the dust-cover over the piston:

rear_brakes_03.jpg


Push it nearly all the way down the piston:

rear_brakes_04.jpg

Until the caliper seal part is hanging off the end of the piston:

rear_brakes_05.jpg

Lubricate the piston & inside edge of the seal with brake fluid. Then locate the outer seal in the caliper groove by manipulating the piston. Push very gently and the piston will slip down and locate the outer seal in the caliper... check carefully it's located... if you need to push with more than thumb pressure then something's wrong!

rear_brakes_06.jpg

Now continue to push the piston down thru the pressure seal, this has more resistance...will need palm-pressure ... if it requires more then be careful - the piston could nip/cut the pressure seal.

rear_brakes_07.jpg

When it's nearly all the way down, the dust cover should be properly located in the piston groove using a fingernail (& attached finger):

rear_brakes_08.jpg

like this:

rear_brakes_09.jpg

Once both halves are complete, bolt it back together:

rear_brakes_10.jpg

Should be good for another 35 years...

rear_brakes_11.jpg
Comments
Rr Brake RebuildAndre Cassis|31 Mar : 10:13
Guest


Reply to this
Congrats....you should have been a Doctor of medicine...unless ofcourse you already are! This is great work. Wish you live here in Montreal and not in Malasia.

Rr Brake Rebuildnwkreativekustoms|04 Jan : 08:40
Guest


Reply to this
Nice one its a cracking job (first time on your site )cant wait to see more of your work its commonly known as an illness Cheers Neil i hope you never get quered of your illness !!!!!

Rr Brake Rebuilddrdfowen|21 Jan : 03:29
Guest


Reply to this
Very Nice work, painting the calipers are nice touch, if you do all that work, why not plus it helps in the future for pad changes etc.

Rr Brake RebuildCorkjag|21 Oct : 23:54
Guest


Reply to this
I just found your website a few days ago. It's an absolute Godsend! Thanks for this detail on the calipers, it saves a week of fruitless forum hopping.

Also loved the steel rod and duct tape for clutch positioning. Nice!

Submit comment
Subject
Username:
Comment: